Everything you need to know about ombre nails

Everything you need to know about ombre nails

This page contains affiliate links. If you want to buy an item please consider using my links at no extra cost to you.

Ombre nails have become increasingly popular over the years. It all started with the infamous “Baby boomer nails” (which is a french faded nail) and has blossomed into an exciting piece of nail art that holds so many possibilities. Not only do Ombre nails look great on their own, but coupled with things like nail art, glitter, or a rhinestone here or there, it can make any set of nails pop.

What are ombre nails?

Let’s start with the basics namely; what are ombre nails? Well, ombre nails can be defined as two or more colors gradually flowing into each other creating a smooth gradient that is not only satisfying to look at but when done right can look amazing. 

This technique can be achieved by flowing a darker color into a lighter one, two colors of similar opacity gradually flowing into each other creating another color where they meet(for example flowing red and orange into each other will create an orange gradient color, this is very useful for when making sunset or galaxy nails), glitter flowing into a solid color, or color gradually flowing over the glitter(creating a milky effect), and pigment graduating over a solid color. 

The ombre effect can be achieved from any direction whether you flow it from the top to the bottom of the nail, or vice versa, vertically over the nail or diagonally, the possibilities are endless.

Chrome pigment

Mia secret acrylic powder for beginners

Pink and white ombre fade

Baby Boomer Ombre

The origin of ombre nails

Ombre nails were first known as “Baby boomer nails”. This name was based on the generation born after WWII namely the baby boomer years. This is because the classic french was very popular and started in the 1940s. It was also very common for people to paint their nails mainly pink and white, according to nail artist Jade Tang.

Baby boomer nails have been practiced by a few nail techs after 2010 but when the original Baby boomer set was created is unknown. This design did, however, “blow up” in France and Germany in 2018, which in turn spread the trend for Baby boomer nails all over the world. Since then people have experimented with more daring ombre designs.

Why do ombre nails cost more than full-color manicures?

When getting your nails done with an ombre style, you might notice that many nail technicians charge more for this style than for a solid-colored set. This can be because of multiple reasons namely:

  • It takes a fair amount of skill to pull off a flawless-looking ombre nail: Some nail technicians even go for additional courses to learn the best techniques to achieve this design.
  • It uses more products: Instead of just using one color, nail technicians will use one or more colors/glitter or even pigment(which can be pricey). An ombre design will also have to be encapsulated with clear acrylic to prevent the gradient from being ruined when the nail is filed. When using gel more than one gel color will have to be precisely blended into each other. When using gel polish you don’t have to encapsulate the design as no filing will be needed afterward. However, it is good practice to at least cover the design with a protective gel layer before applying the topcoat to prevent the gel polish from chipping.
  • It takes longer to do an ombre design than it does to apply a single solid color.

Are ombre nails out of style?

Absolutely not. Even though ombre nails started becoming trendy in 2018, it’s still going strong in 2021 as of the time writing this. Although the ombre effect has since then evolved quite a bit, mixing the use of more than two colors, neon designs, glitter, and even pigment. Some designs also ombre the colors vertically instead of horizontally(which was the original ombre design). I do believe ombre nails will still have a hand in the trend cookie jar for some years to come. Even the classic “Baby Boomer” design is still quite popular, as its elegant and soft design makes your nails look girly and classy.

Ombre nail examples

blue and white ombre nails with art

Blue and White Ombre with Line Art

chrome ombre nails with art

Chrome Ombre with a Cartoon Bunny

Baby Boomer Ombre with 3D Nail Art

Can you do ombre nails with any nail system?

Ombre nails can be achieved with any nail system. Whether you use gel, acrylic, acrylic dipping system, or polygel, an ombre effect can still be achieved. The method of how these designs are done does differ quite significantly from one another.

What color should I ombre my nails?

Ombre nails are quite versatile and are no longer bound to the classic white and pink look. Whether you want to use neon colors, pastels glitter, or chromes, it is up to you. It is however important to make sure that the two colors will complement each other. Using colors like orange pink and purple together is the perfect match for creating a sunset effect. 

If you want to lean towards a dark color like black using similarly deep colors is best. For example, instead of using a neon red, use a deep maroon instead as the two colors will flow into each other better and look more appealing to the eye. If you try to blend two colors that are too different in opacity you might be left with an odd-looking design and a clear line where one color stops and the next begins, this is not what you want when creating the perfect ombre set.

Adobe has an amazing tool to check matching colors that you can use to see what colors will work with each other. Check it out here. Another site you can go look at is ColorSpace for creating gradients. Check it out here

How to do glitter ombre nails

Glitter gradient nails are a definite favorite of mine. You can play around with this and create the most beautiful-looking sets. 

  • You can start by placing the glitter on top of the solid color at the front or back of the nail.
  • Fade the glitter onto the color as far as you want the gradient to go. It is important to remember to fade it as naturally as possible. Where the gradient stops the glitter has to be sparse.

To create a milky ombre effect, place the glitter first and then fade the solid color over top. Place the glitter at the back or front of the nail and fade the solid color to cover a bit of the glitter and the rest of the nail. This will cause the covered glitter to look milky, while at the same time leaving some uncovered glitter exposed.

How to do ombre nails:

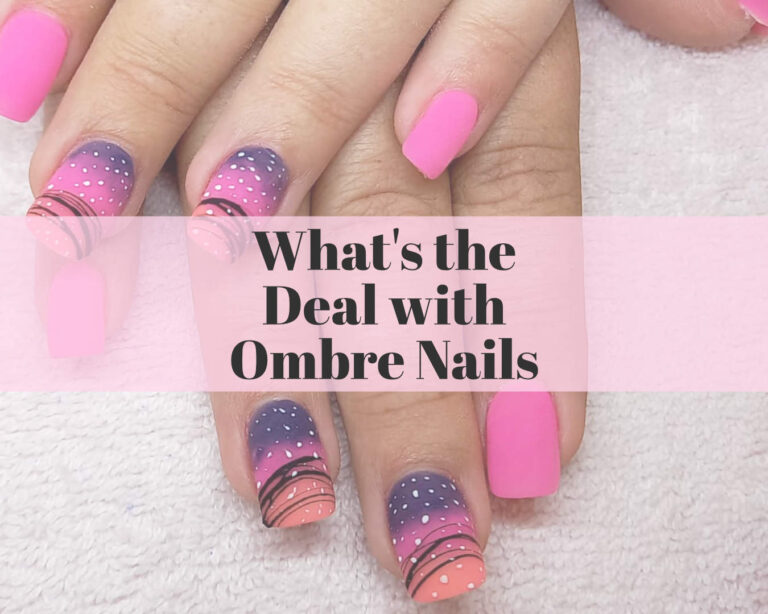
As mentioned before ombre nails can be achieved on most nail systems. I will be covering how to create the perfect ombre on acrylic and gel nails.

How to do ombre nails with acrylic liquid

To create the perfect ombre design with acrylic, you will have to follow the right technique. Whether you use two, three or more colors the concept stays the same. You will have to work fast as acrylic air dries and if it dries before you blend the colors correctly it can be tricky to rectify.

One thing to remember is that you want the darker color to be underneath this will give the best-looking gradient. 

  • Place the darker color first using quite a wet bead. Remember to use a small amount of product as you still have to encapsulate the design. Working too thickly will leave you with a bulky looking nail. 
  • Fade the darker color back so that it starts to thin out and become translucent. You want a light color that will be able to cover the dark color. 
  • Place the lighter color back, away from the darker one. Fade it down into a darker color. Don’t fade it completely over the dark color as you still want to be able to see the dark at the tip of the nail. 
  • You have to focus on blending the lighter color in such a manner so that the faded part of the dark color is covered but you will still be able to see some of the dark color through the lighter one. 
  • Depending on how much of the darker color you want visible, you can play around with how far you blend the light color.
  • Wait for the design to dry a bit and then encapsulate the parth where the two colors touch with clear acrylic. This is important as you want to protect the design underneath. If you file the nails without encapsulating them you’ll simply file off the gradient

Ombre nails can look good with a matte or glossy top coat. It will however pop a lot more with gloss. Just note that you will be able to spot imperfections and incorrect blending a lot easier with a glossy top cat than with matte.

How to do ombre nails with gel

You can achieve ombre nails with gel in two ways. You can either use the sponge or the brush method. I will tell you how to use both. 

Gel ombre using a gradient brush

To create an ombre using a brush you will need a specific gradient brush to do the job. These types of brushes have hair at the bottom and a thin amount of longer hairs standing up. Using this will give you an easy beautiful ombre effect. 

  • To start you will need to place down the two (or more) colors you want to use. You have to apply the colors close together so be careful when using your gel polish brushes so that you don’t accidentally touch another color with one colors brush. Rather use a separate gel brush to get the colors as close together as possible. 
  • Now, you want to use your gradient brush to start mixing the colors together where they touch. Use a soft swiping motion to carefully blend the colors only where they touch. Do this until you can see a third color forming where the two colors mixed together. 

Remember when using gel polish to work in thin layers, as working too thickly will cause the gel to not cure properly and you’ll have to redo everything. If the gel isn’t as opaque as you’d like after one layer, repeat this process until you’ve reached the desired opacity.

Gel ombre using a sponge

This method is completely different than using a gradient brush and many people prefer it. 

  • To create an ombre ths way you’ll first apply your lighter color and cure it. 
  • Then you will use an ombre sponge or even a regular makeup sponge to apply the darker color on top. 
  • Start by first applying the darker color with a brush at the tip of the nail, then use the sponge to gently blend the color backwards. 
  • Add color if you feel it is too light. When you are happy with the result cure it in a UV/LED lamp for 60 seconds.

Gel gradient brush

Gel gradient sponge

If you found this post helpful or enjoyable please share it with your friends and family.

Get free printables sets when you sign up for my newsletter.

Thank You

This website uses cookies to ensure you get the best experience on our website.