
Nail Tech Money Saving Tips
This page contains affiliate links. If you want to buy an item please consider using my links at no extra cost to you.
When starting your nail business, you will soon learn that there will be many expenses, especially when you’re still busy with your training. Once you’re on your feet you will have to buy products every month. Learning how to work sparingly with your products can save a lot of money in the long run.
Changing the size acrylic brush that you’re using, buying the right dappen dish and taking care when filing the nails are some ways that you can save money in the long run when doing acrylic nails.
Buy clear acrylic in bulk
Something that has not only saved me time but that saves a lot of acrylic and monomer is encapsulating nails with clear. And I don’t mean only encapsulating things like glitter, but any colour. Clear is a core acrylic, which means it’s generally easier to work with and is a lot harder in texture compared to a colour like white.
When you encapsulate your nails you’ll only use a little bit of the colour and build up the nail using clear. The reason this will save you money is that you can very easily build up your apex with clear, whereas using something like black is harder to work with. You will possibly end up using a lot more monomer trying to build up the nails with colour.
When filing a colour it is usually easier to over-file than with clear. This means that you will very easily file off too much product, which will, in turn, result in you having to build up the nails again and fixing your errors. This will waste product as well as time, and cost more money.
Not all colours have to be encapsulated, however, I find that colours like cover pink are also a core acrylic so works the same as clear. This will however differ from brand to brand. You will have to physically work with the colours to determine if they will need encapsulation or not.
I have a large container of clear acrylic and I usually only buy small containers of coloured acrylics. They tend to last me very long, and even though I use clear acrylic to encapsulate, seeing that it is so easy to work with, a large container lasts me quite a while.

Invest in a smaller acrylic brush
I loved my size 12 kolinsky brush and I thought that it was the most effective way to do nails until my brush got ruined and I had to buy a new one. I was advised by the shop owner to buy a size six brush as she loved it. Initially, I thought it would be way too small but I was mistaken!
I soon realised that my larger brush was using so much of my monomer without me even realising it. And I think I speak for all nail technicians by saying that monomer is liquid gold. It’s not the most inexpensive product needed to do a set of nails!
Not only did my smaller brush use exceptionally less monomer, but I felt more in control of the product. I rarely use more acrylic that is needed now, which means that my filing time is minimized, and the amount of product that’s gone to waste after filing is also a lot less.
A lot of people like to do one bead placements when working with acrylic. This can be great and save a lot of time, but it takes time to get the consistency right, and seeing that no one has the same size nails it can be hard to master the liquid-to-powder ratio. Doing acrylic on small nails can be exceptionally harder when using a large acrylic brush, as you won’t need nearly as much monomer as the brush will absorb.
Using less of the product will also help you apply the cuticle beads perfectly and create a flush cuticle and sidewall area that hasn’t been flooded with the product. A flooded cuticle is one of the worst things to have to fix.
Using a smaller brush will also help with temperature changes, as acrylic is affected by the surrounding temperature. On warm days, acrylic tends to set and harden much faster than on cold days. And in cold weather acrylic can become runny and a lot harder to control and work with. Using a small brush the amount of acrylic that you place will be less, so on warm days, you can easily mould the acrylic before it hardens. On cold days the amount of monomer you use will be less and the product will be easier to handle. The risk of wasting product due to running is also lessened.

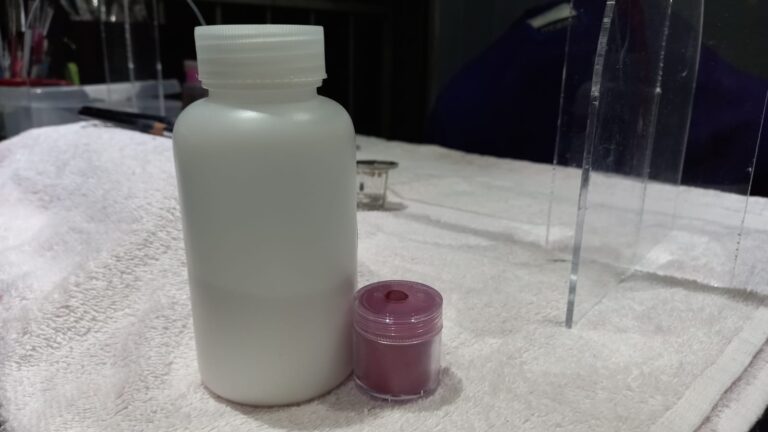
Buy a smaller dappen dish with a lid
This tip is something that I only recently started doing myself but it has saved me so much money. I used to have a large dappen dish, but thankfully for me, it shattered. I had a smaller replacement so started using it instead. And wow, was I shocked at how much monomer I was wasting!
When doing a set of nails you have to work carefully with the amount of monomer you pour into your dish as monomer tends to evaporate quite fast. Also after you’re done with one client, it is a good practice to dispose of the left-over monomer, as can’t be thrown back into the bottle once there are traces of acrylic mixed in. So in conclusion, if you pour too much monomer you will have to throw away so much after you’re done with your client.
Using a lid helps with keeping monomer from evaporating. If you’re for instance done with the nails and moving on to filing, but still want to use the monomer for 3D flowers after you’re done filing or to apply acrylic to your client’s toenails, it’s a good idea to cover the dish with a lid to keep the monomer from evaporating. I have wasted so much monomer through evaporation. When covered with a lid monomer won’t evaporate and will stay at relatively the same level for hours. Covering your monomer will also help prevent any dust or debris from contaminating it.
I don’t believe I am the only nail tech out there that has the misfortune of accidentally tipping over my dappen dish. It’s a sad day when it happens. It’s even worse when you use a large dish that is filled to the brim with clean monomer and accidentally spill everything. This is another reason to invest in a small dappen dish.
Take care of your acrylic brush
Acrylic brushes are not cheap and it can be devastating when taking it out the next day only to realize that acrylic got stuck in the bristles. Many people recommend using acetone to remove any acrylic, and I do agree this works. But when doing this many times the bristles will start to become brittle and even fall out.
Cleaning your brush with acetone should only be a once-in-a-while if all else fails-type of thing, and should not be done regularly. When using a kolinsky brush you will soon realize that they are made with real, quality hair and have to be taken care of. Real kolinsky brushes are expensive. I don’t think any nail technician wants to buy a new brush every month. This is not economic.
A way I take care of my brush is to soak it in clean monomer after each use. Once I’m done applying acrylic to my client’s nails, I soak the brush while filing. After my client is done, any acrylic that might have been trapped between the bristles during application would have been dissolved. You can dry the brush by gently rubbing it onto a piece of kitchen paper.
Storing your brush is also another way that the bristles can be ruined. It is always better to store it horizontally. You should never store your brush with the bristles facing down, as they will bend and it won’t be easy to get them back to normal.
I am fortunate enough to have an acrylic brush that can disassemble so that the bottom part can be used as a lid. This helps with storing as the bristles are protected and the brush won’t be contaminated with dust.
When using acetone to clean your brush, it is very important to soak it in monomer afterwards as acetone dehydrates the bristles. When soaking in acetone, be careful not to drop the entire brush in as acetone will eat through the handle. After you are done soaking your bristles in monomer for a couple of minutes, dry it off. You can also apply cuticle oil now and then to keep the bristles in tip-top shape.
Store your products correctly
Whether you specialize in acrylic or gel nails, the fact of the matter is that most products you’ll use are UV sensitive. It is therefore very important to store all of your products correctly to keep them from being ruined.
Gel, monomer, dehydrators, top-and base coats, and sanitiser are all things that have to be stored out of sunlight in a cool dry place. Gel-based products will certainly start to cure, and alcohol products like sanitiser will evaporate in warm environments. You will lose so much money if you don’t take care to store your products correctly. Replacing everything at once is a scary thought.
My desk has a lot of storage space. I have a drawer where I usually keep the things that I need easy access to like my tips, base coat, topcoats, dehydrator, etc. Underneath my drawer I have a large cabinet space where I keep my bulk products like acetone; sanitiser and gel residue wipe off solution. Then I also have a storage cabinet on the other side of my table where I store acrylics and glitters as well as an assortment of other products. My gel polishes are displayed on my wall away from sunlight.
Natural light is very appealing but you don’t want any natural light shining on your work area. It’s a better option to invest in a good desk lamp and quality overhead lighting.
Take care when filing
When filing the nails it can be quite easy to over file. When you over-file the nails, one of two things can happen, you can either file off the applied product which will result in “bold sports” on the nails, and you having to reapply the product where necessary, Or the tip/ extension breaking due to too much filing.
When you have to apply more product due to over filing, you not only waste product like monomer and acrylic, but you also waste time, because you will have to wait for the nail to dry before you can re-file it and apply art/ the topcoat.
When you are in a rush you might file too fast and vigorously, this will not only potentially hurt your client due to friction burn, but it can also cause the tips or sculpted extension to crack and break off. This happens due to the product being filed too thin and then causing the extension to be weak, and can also be caused due to too much filing and you handling the nails too fiercely.
Be careful not to file too much. This comes back to the application, if you applied the right amount of product you won’t have the need to file too much. I like to de-bulk the nails using my e-file and then go in with my hand file to refine the shape of the nails and to smooth out the surface. This saves me time, unnecessary mistakes and ultimately money.
Only using a hand file does not only waste time, but it can cause harm to the joints in your hands over time. You will also have to monitor the amount of pressure you need to apply to remove more or less product. The chances of you accidentally cutting your client is also much higher when using a hand file. When using an e-file you won’t have to apply much pressure and you can set the file to your desired speed. When hand filing you can easily get carried away and hurt your client or destroy the nails.

Refill nearly empty acrylic containers on time
The acrylic powder comes in a variety of different sized containers. I like to buy new refill colours before I run out. When your colours are almost one you can easily ruin the rest of the acrylic by a small mistake.
If the container is almost empty it is very easy to accidentally touch the bottom of the container with your monomer-soaked acrylic brush. This will cause the acrylic surrounding the bottom of the container to become soaked and stick to the bottom.
This will waste your product and also potentially ruin your container. What I like to do when I have a bit less than a quarter of the product left is to open the new container. Once it has been used enough I throw in the leftover colour from the old container with the new one. This helps me to get the most out of my acrylic powder.
Saving money when having your own business is so important. It is hard to be your boss as all of the expenses rests on your shoulders. Make sure you save money where you can by not making unnecessary mistakes.
If you found this post helpful or enjoyable please share it with your friends and family.
More Posts that you might like.